
How Do I Use Image Tracer in Figma?

Figma is a cloud-based design platform used by a wide range of people, from UX/UI designers, web developers, graphic designers, product managers, and more.
It gives users the ability to collaborate on projects in real-time and create high-fidelity designs quickly and easily. Figma is becoming increasingly popular for its ease of use, speed, and versatility in terms of design.
Can you trace images in Figma?
Unfortunately, Figma does not have an in-built feature to trace images. However, there are some community-made plugins that can do the job for you. These plugins are easy to install and use.
How do I trace images in Figma?
Tracing images in Figma is quite simple. All you need to do is run the image tracer plugin. Once installed, you simply need to open the image you want to trace in Figma.
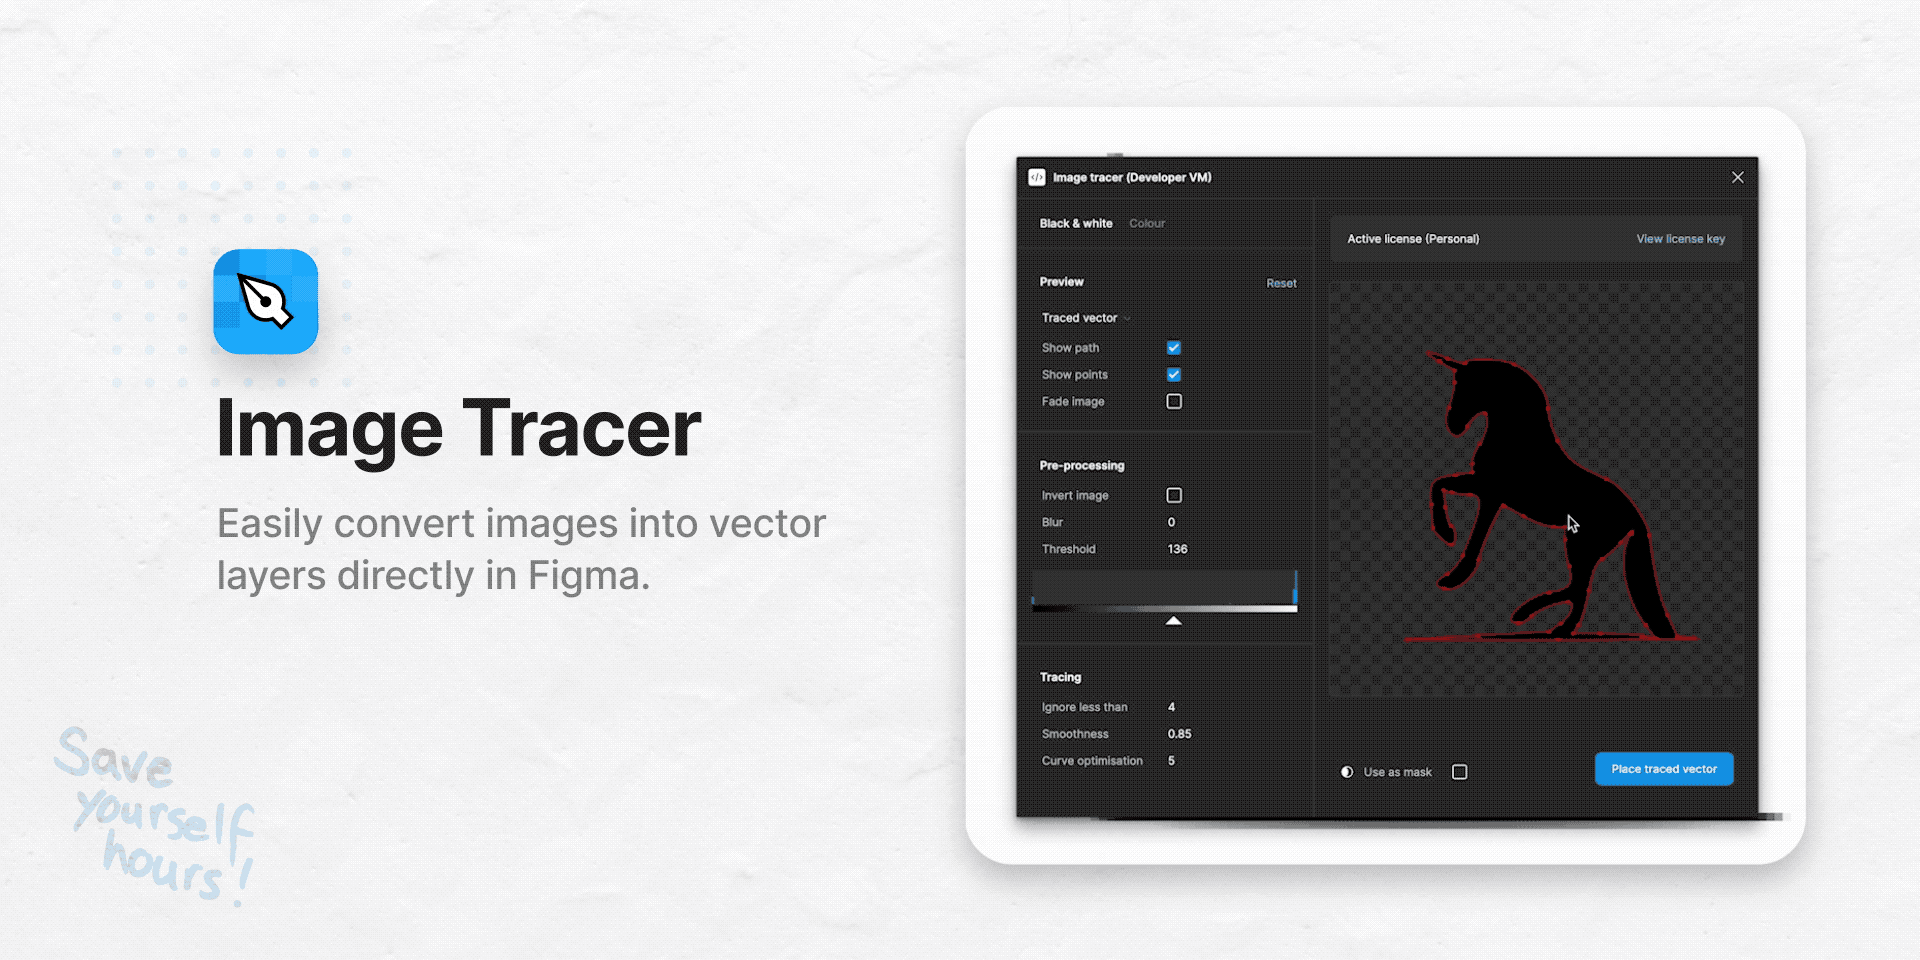
Select the image, then click on the plugin icon in the toolbar. You'll see a list of options to choose from, including the ability to change the complexity of the trace, as well as the color of the tracing lines. Once you've made your choices, hit the tracing button and you'll see your image traced in Figma.
Here's a video tutorial that shows you how to do it step by step:
Conclusion
Tracing images in Figma is a great way to create high-fidelity designs quickly and easily. With the help of some community-made plugins, you can trace images with ease.
All you need to do is install the right plugin, open the image you want to trace, and follow the steps. With a few clicks, you'll have a perfect trace of your image in Figma.
