How Do You Make a Hover State in Figma?

Hover states in Figma are an essential part of creating a good looking prototype. But if you're not familiar with Figma, it can be confusing to figure out how to make them. Here's a quick guide to getting your hover states up and running.
How Do You Make a Hover State in Figma?
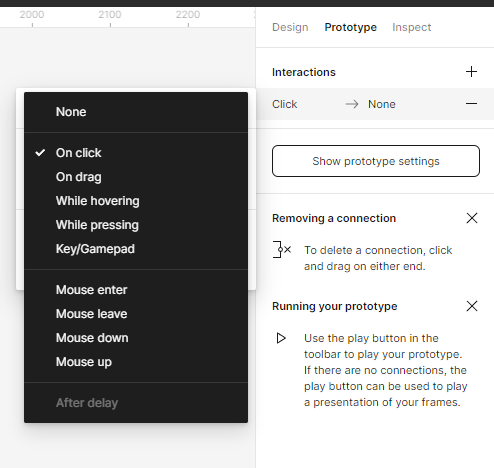
First, select your layer. Then, go to 'Prototype' in the top-right corner. This will bring up a 'Prototype' tab with several options. To add a new interaction, click 'Add Interaction'. This will open a drop-down menu, and from here you'll select 'while hovering'.

Once you've selected 'while hovering', Figma will open a menu with a variety of options. Here you'll set your hover state . If you want the layer to move when you hover - you can select 'move'.
Or if you want the layer to change color, you can select 'fill color' . And if you want to add a link, you can select 'go to URL'.
Once you've made your changes, you can preview your hover state by clicking the 'play' button in the top-right corner. If you're happy with the results, you;re done! Your hover state is now live.
Creating hover states in Figma is super easy once you get the hang of it. So why not give it a try? You'll be a pro in no time!
